


 English
 中文简体
中文简体 Français
How to Use a Cosmetic Vacuum Travel Bottle: Step-by-Step Filling & Refill Guide
Content
- 1 Step 1: Understand Your Bottle Type
- 2 Step 2: Prepare the Bottle Properly
- 3 Step 3: Fill Without Trapping Air
- 4 Step 4: Prime the Pump and Test for Leaks
- 5 Why Vacuum Bottles Are Worth the Extra Filling Effort
- 6 Choosing Your Ideal Travel Vacuum Bottle
- 7 Common Mistakes and How to Avoid Them
- 8 Travel Tips: Pressure Changes and Packing
You bought a set of sleek, airless vacuum travel bottles for your upcoming trip, but when you try to pump in your favorite serum, nothing happens—or worse, the product leaks out from the cap. This is the most common frustration people encounter with cosmetic vacuum travel bottles, and it almost always stems from a misunderstanding of how the internal mechanism actually works. Unlike a standard squeeze bottle or a traditional pump dispenser, a cosmetic vacuum travel bottle relies on a rising piston or an inner bag to create a controlled vacuum seal. Once you understand the two-step process—preparing the bottle and then filling it correctly—you will never waste product or deal with messy leaks again.
Step 1: Understand Your Bottle Type
Before you start filling, you need to identify whether your travel bottle uses a piston-driven system or an inner-bag vacuum system. The method of filling differs for each.
| Feature | Piston-Driven Vacuum Bottle | Inner-Bag Vacuum Bottle |
|---|---|---|
| Internal Structure | A disc (piston) sits at the bottom of the bottle and rises as product is dispensed. | A collapsible inner bag holds the product; the outer shell remains rigid. |
| Filling Method | You must fill from the bottom opening (where the piston is) by pushing the piston down as you pour product in. | You fill from the top opening, similar to a standard bottle, because the inner bag expands as product enters. |
| Common Leak Cause | Filling from the top traps air, preventing the piston from moving and forcing product out the pump. | Overfilling the bag or failing to seal the outer cap properly. |
| Best Suited For | Thin liquids like toner, setting spray, or micellar water. | Serums, lotions, and creams with moderate viscosity. |
Most travel-size vacuum bottles sold today are inner-bag designs because they are easier for consumers to refill. If your bottle has a visible disc at the bottom that you can press with your finger, it is piston-driven. If the bottle feels solid and you see no disc, it is almost certainly an inner-bag vacuum bottle.
Step 2: Prepare the Bottle Properly
Regardless of the mechanism, always start with a clean, completely dry bottle. Residual moisture can introduce bacteria and cause the vacuum seal to fail over time.
- For inner-bag bottles: Remove the pump and the screw cap. Hold the bottle upside down over your product container.
- For piston bottles: Unscrew the entire bottom cap. You will see the piston disc at the base. Gently push the piston down with a blunt object (e.g., the back end of a makeup brush) to create space for the liquid.
A common error is to force the pump down without first resetting the piston or bag in piston bottles. This compresses trapped air, leading to a weak or sputtering pump output. If you are refilling a bottle that was used before, press the pump several times after emptying to reset the piston to the bottom.
Step 3: Fill Without Trapping Air
Air is the enemy of vacuum bottles. When air is trapped inside, the pump cannot create the negative pressure needed to push product upward.
Filling an Inner-Bag Vacuum Bottle
- Place the bottle on a flat, stable surface.
- Pour your product directly into the opening, filling it to no more than 90% of the bag's capacity. Leave a small air gap at the top.
- Wipe the rim and threads clean with a lint-free cloth.
- Screw the pump back on tightly. Do not force it—tighten until you feel a slight resistance, then stop.
Filling a Piston-Driven Vacuum Bottle
- With the bottom cap removed and the piston pushed down, hold the bottle upright.
- Pour your product into the top opening until the bottle is about 80% full. The piston will gradually rise as you pour. Stop when the piston reaches the 80% mark—do not fill past the piston's current position.
- Screw on the top pump and then replace the bottom cap.
- To prime the pump, press it slowly 3–5 times. You should see the piston start to rise with each pump.
A good test for proper filling: after the first few pumps, a small amount of product should come out consistently. If the pump only expels air or clicks without output, you have air trapped. In piston bottles, you may need to unscrew the bottom cap, push the piston up slightly to release trapped air, and then re-cap.
Step 4: Prime the Pump and Test for Leaks
Priming is non-negotiable. A vacuum pump that has not been primed will not dispense product until the trapped air is evacuated.
- Hold the bottle upright.
- Press the pump head down firmly but slowly. A fast, forceful press often triggers leaks because it forces product up too quickly for the seal to contain it.
- After 4–6 slow presses, product should emerge. If it does not, wait 10 seconds and repeat the slow presses.
- Once primed, turn the bottle upside down and hold it there for 5 seconds. A properly sealed vacuum bottle will not leak a drop. If you see any moisture, tighten the pump and try again. If leak persists, the pump seal may be compromised—do not travel with that bottle.
Why Vacuum Bottles Are Worth the Extra Filling Effort
Compared to standard jars or screw-cap tubes, a properly used vacuum bottle offers two clear advantages: it extends the shelf life of your product by preventing oxygen exposure, and it dispenses nearly every drop—down to the last 1–2 grams. For high-value serums or prescription creams, that translates directly into cost savings. The initial learning curve is small, but once you master the freshness-preserving mechanism of inner bag vacuum bottles, you will never want to travel with exposed jars again.
Choosing Your Ideal Travel Vacuum Bottle
Not all vacuum bottles are equal when it comes to travel. Consider these criteria before purchasing a new set:
| Criterion | Why It Matters | Recommendation |
|---|---|---|
| Capacity | TSA carry-on limits and trip duration determine the needed volume. | 30ml–60ml per bottle for a 1-week trip. |
| Pump Type | A standard airless pump works for lotions; a spray pump is for toners. | Choose a pump that matches viscosity of your product. |
| Seal Quality | Air travel pressure changes can cause leaks if seals are weak. | Look for bottles with an inner seal ring or a child-resistant cap. |
| Refillability | Some bottles are designed for one-time use; others are reusable. | Choose inner-bag refillable designs for long-term reuse. |
For a balance of capacity, seal integrity, and reuse convenience, a 30ml or 50ml inner-bag vacuum bottle is the most practical choice for most travelers. The 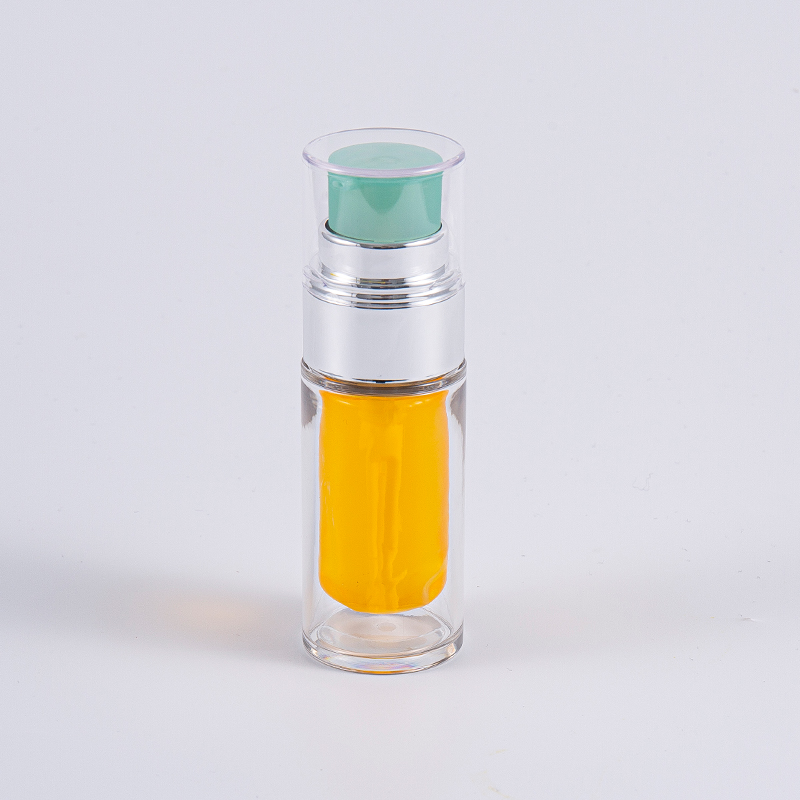 30ml 50ml Clear PETG Vacuum Bottle with Inner Bag and PumpThis compact vacuum bottle offers reliable seal integrity and a transparent body to monitor remaining product, making it the most practical choice for travelers who need balanced capacity and reuse convenience.View Product → delivers a reliable seal and a clear body that lets you see exactly how much product remains, so you never run out mid-trip.
Common Mistakes and How to Avoid Them
Even experienced users make mistakes. The three most frequent problems—and their simple fixes—are these.
- Mistake 1: Overfilling the inner bag. When the bag is too full, the pump has no room to create a vacuum, causing leaks or a weak output. Fix: fill to no more than 90% of capacity.
- Mistake 2: Not cleaning the threads before closing. Residual product on the threads prevents the cap from sealing tightly. Fix: always wipe the rim and threads dry before screwing on the cap.
- Mistake 3: Pumping too fast when priming. Fast pumping forces air back into the bag and creates foam. Fix: pump slowly, waiting 1–2 seconds between each stroke.
By avoiding these three errors, you will get reliable performance from any vacuum travel bottle. If you need a larger capacity for longer trips, consider the  100ml Large Capacity Vacuum Cosmetic Container for SkincareWith a vacuum design that prevents oxidation and ensures nearly 100% product dispensing, this 100ml bottle suits longer trips and is easy to handle—just release cabin pressure via the cap after flight.View Product → which offers 100ml in the same user-friendly inner-bag design.
Travel Tips: Pressure Changes and Packing
Airplane cabin pressure can force small amounts of product out of even well-sealed bottles. To prevent this, place your filled vacuum bottle inside a sealed zip-top bag, and pack it in an upright position in your carry-on. Upon arrival, if the bottle seems stubborn to pump, simply release the pressure by loosening the cap slightly until you hear a faint hiss, then retighten. The bottle will then dispense normally.
For more than two decades, manufacturers like Shaoxing Lizhi Plastic Products Co., Ltd. have engineered vacuum bottles that withstand these pressure fluctuations. When you reuse a quality bottle you’ve filled yourself, you are also reducing single-use plastic waste compared to buying new 50ml travel-size products for every trip.
PREV:No previous articleNEXT:Multi-Layer Lotion Bottles: Structure, Barrier Benefits, and Selection Guide
Interested in cooperation or have questions?
Subscribe to us and
get the latest updates.
get the latest updates.
Stay In Touch

Product Links
Contact Us
-
Phone: +86-13567569350
-
Tel: +86-575-82575298
-
Email: [email protected]
-
Add: No. 5 Plant, Zhejiang Tengxin New Energy Industrial Park, Daoxu Street, Shangyu District, Shaoxing City, Zhejiang Province, China.
Copyright © Shaoxing Lizhi Plastic Products Co., Ltd.